
Channel Automation Guide 2026 — Set It Once, Post Clips Forever

Eric Lee
CEO and Founder of Ssemble
Manual clipping is what kills most clippers. You find a great YouTuber, you spend a Saturday cutting ten clips, you post them, you wait. By the time the next upload drops, you're busy, you're tired, and the cycle breaks. Volume dies. Views die. You quit.
Channel Automation is the fix. You point Ssemble at a YouTube channel once, set your clip and posting preferences once, and from that moment on every new upload from that channel gets auto-clipped and auto-posted to your fresh TikTok, YouTube Shorts, and Instagram Reels accounts — on the schedule you choose, with AI-written titles and hashtags per platform.
This guide walks through the exact setup at app.ssemble.com/channel-automation, the one setting that matters most, and the three rules that separate clippers who 10× their volume from clippers who just create more noise.
What Is Channel Automation?
Channel Automation is a hands-off pipeline that monitors a YouTube channel for new uploads, identifies the viral moments with AI, cuts them into Shorts-ready clips, and auto-posts the qualifying ones to your connected social accounts on a recurring schedule.
It's built for clippers who already know which creator they want to ride and just want to remove themselves from the loop. One important constraint: it processes new uploads only — there's no backfill of the channel's existing videos. So pick a channel that uploads consistently.
The 5-Step Setup
From the Channel Automation page, click Add Channel. The setup is one modal with five steps:
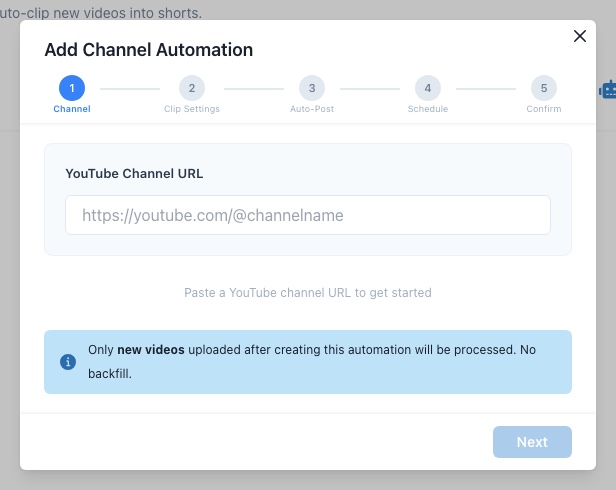
Step 1 — Channel
Paste the YouTube channel URL — youtube.com/@handle, /channel/UCxxx, /c/name, and /user/name all work. Ssemble resolves it and shows a preview card with channel name, subscriber count, and the most recent upload. Confirm it's the right one.
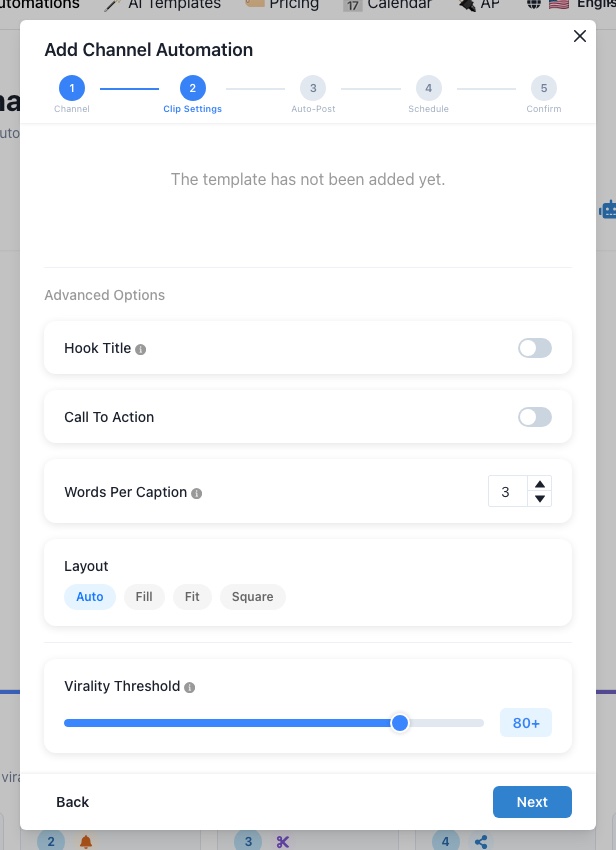
Step 2 — Clip Settings
Pick Preferred Clip Length (<30s, 30s–60s, or 60s–90s), choose a Template from the carousel, and open Advanced Options to toggle Hook Title (AI-generated punchy titles), set a Call To Action (max 100 characters, 2 lines), choose Words Per Caption (1–7), and pick a Layout (auto / fill / fit / square). At the bottom you'll find the Virality Threshold slider — we'll come back to this one.
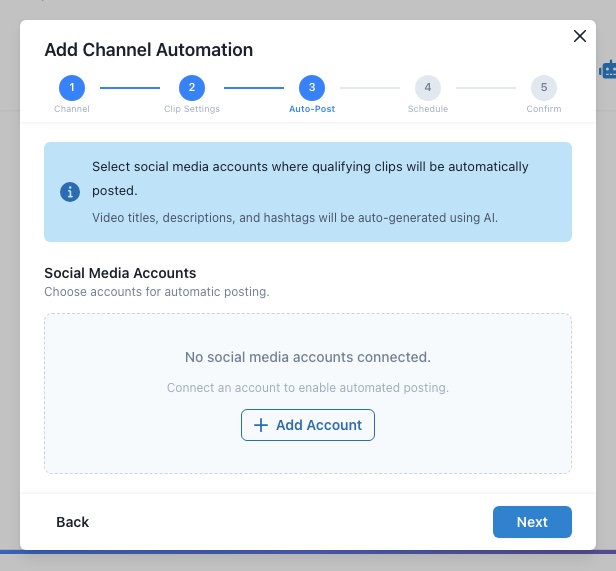
Step 3 — Auto-Post
Select which connected accounts get the clips — YouTube Shorts, TikTok, Instagram Reels. Add Account launches OAuth if you haven't connected one yet. Titles, descriptions, and hashtags are AI-generated per platform.
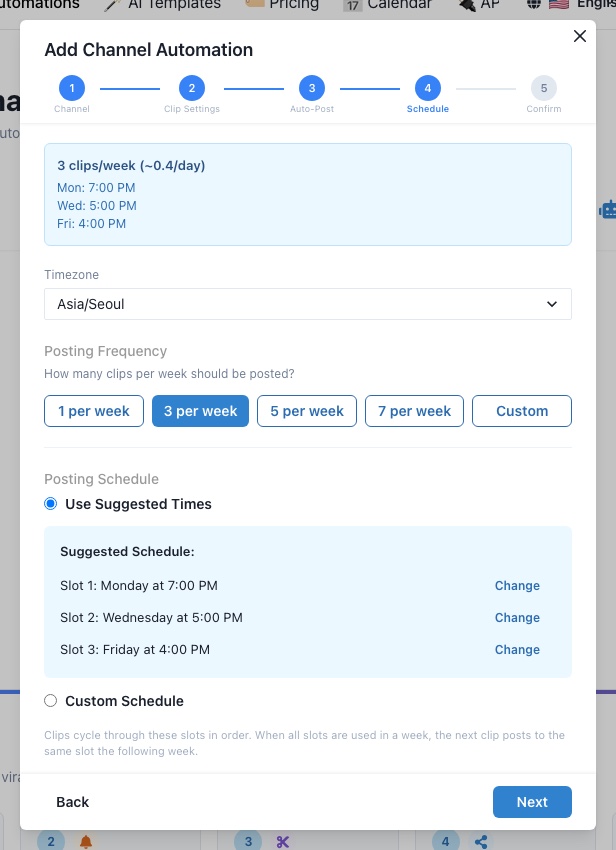
Step 4 — Schedule
Set your timezone, then Posting Frequency: 1, 3, 5, or 7 per week, or Custom (up to 21/week or 3/day). Choose Use Suggested Times for proven-best engagement slots, or Custom Schedule to set each slot manually. Clips cycle through slots round-robin.
Step 5 — Confirm
Review the summary. Hit Create Automation. You're done.
The One Setting That Matters Most: Virality Threshold
Inside Clip Settings there's a slider from 0 to 100 called Virality Threshold. Default is 80. This is the single most important setting in the entire flow.
Every clip Ssemble cuts gets an AI virality score. Clips above your threshold get auto-posted. Clips below it land in your dashboard for manual review — you can still post them with one click, but they won't go out automatically.
- Set it at 80 (default) if you trust the AI and want maximum hands-off volume.
- Lower it to 60–70 when you're trying a new niche or template and want more clips to evaluate.
- Raise it to 90+ when you're posting to high-follower accounts where one weak clip can suppress your reach for days.
If your auto-post queue is empty for days, your threshold is too high. If you're embarrassed by what's going out, it's too low.
Best Practices for Clippers
Three rules that separate the people who actually scale from the people who just turn it on:
- Pick a YouTuber who uploads at least once a week. Automation only processes new uploads — no backfill. If your chosen creator goes dark for a month, your queue goes dark too. Check the channel's last 4 weeks of upload history before you commit.
- Connect 3+ accounts per platform. When a clip hits, you want the same source riding multiple TikTok / Shorts / Reels accounts with slightly different templates. Set up parallel Channel Automations using different Templates and Hook Title styles — same source, different presentation. Combine this with the Account Warm-up Guide so every new account has algorithmic trust before the first auto-post lands.
- Start with Use Suggested Times, then switch. For the first 7–10 days let Ssemble post at suggested slots so you collect baseline data. Then look at which slots actually drove views, switch to Custom Schedule, and concentrate your posts there.
Set It Once, Compound Forever
The whole point of Channel Automation is that the work is front-loaded. You spend 10 minutes setting it up, and from that point on every new upload from the source channel turns into multiple clips across multiple platforms without you touching anything. Your job shifts from "make clips" to "pick the next channel and tune the threshold."
That's the unlock. Manual clippers max out at the number of hours in a weekend. Automated clippers max out at the number of channels they're willing to monitor — and that number is much, much bigger.
Set Up Your First Channel Automation
Pick a YouTuber, paste the URL, and let Ssemble cut and post their next upload for you — automatically.
Try Channel AutomationRecommended Reading
Ready to Start Clipping?
Transform long videos into engaging short-form clips with Ssemble's AI-powered tools.
Get Started